
Activating Business Email (Prompt Email Address) and Setting up Alias in Gmail Suite
Contents
Activating Business Email (Prompt Email Address)
1. Check Your Personal Email for the Invitation
The first step is to find the email invitation sent by your administrator.
- Open the personal email address you provided to your organization (e.g., yourname@gmail.com, yourname@yahoo.com).
- Look for an email from Google Workspace or a specific email from your administrator. The subject line is often something like "Welcome to your new Google Workspace account" or "Activate your new business email."
-
If you can't find it, check your spam or junk folder. The email contains a link you need to click to get started.
2. Set Up Your Account and Password
Once you have found the invitation email, click the link to begin the setup.
- Click the "Sign in" or "Get started" button in the invitation email. This will take you to a Google sign-in page.
- The page will display your new business email address (e.g., your.name@yourcompany.com).
- Follow the on-screen prompts. You will be asked to create a new password for your account. This is not the same as your personal Gmail password. Choose a strong, secure password that you haven't used before.
- Once you have created your password, you will be able to sign in to your new Google Workspace account.
3. Access Your New Business Email and Applications
Congratulations! You have now activated your business email address. You can access it just like you would with a regular Gmail account.
- Go to mail.google.com in your web browser.
- Enter your full business email address (e.g., your.name@yourcompany.com) and the new password you just created.
- You will be able to access your inbox and other Google Workspace applications like Google Drive, Calendar, Docs, and more.
4. Optional: Add a Recovery Phone or Email
For security, it is highly recommended that you add a recovery method to your account. This will help you regain access if you ever forget your password.
- In your new inbox, click on your profile picture or initial in the top-right corner.
- Click "Manage your Google Account."
- Go to the "Security" tab on the left-hand side.
- Under "Ways we can verify it's you," you can add a recovery phone number or a recovery email address.
- Follow the instructions to confirm your personal phone number or email.
This extra step ensures that your account is secure and that you have a way to reset your password if needed.
Setting up 'Send mail as:' or alias (Use Prompt Health Mail to send from your other email addresses)
Your administrator has created an email alias for you in the Google Admin Console. An alias allows you to send emails from a different address (like info@yourcompany.com ) while all the incoming messages still arrive in your primary inbox.
Here's how to set it up so you can send emails from that new alias.
1. Open Your Gmail Settings
This process must be done from a computer or a web browser, not the mobile app.
- Go to mail.google.com and sign in to your primary business email account.
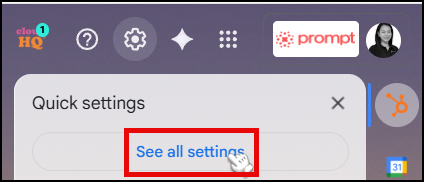
- In the top-right corner, click on the Settings icon (a gear).
- A quick settings menu will appear. Click the "See all settings" button at the top of that menu.
- If you’re new and haven’t activated your
@promptemr.comaccount yet, you should have received an email invite in your personal email address. - Open that invite and follow the instructions to set up and activate your
@promptemr.comaccount.
Once your account is active, continue below.
2. Add the Alias to Your Account
In your Gmail settings, you'll find the option to add another email address to send from.
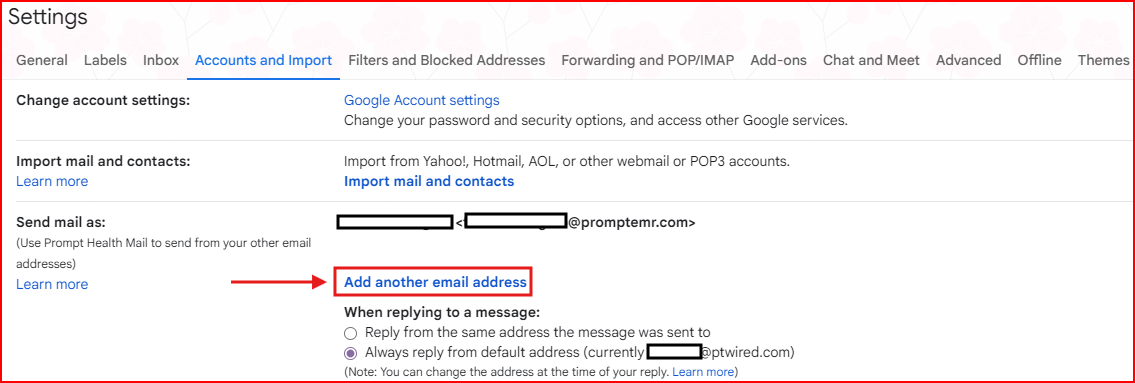
- Navigate to the "Accounts and Import" tab. It's located at the top of the settings page.
- Find the section titled "Send mail as", click "Add another email address"
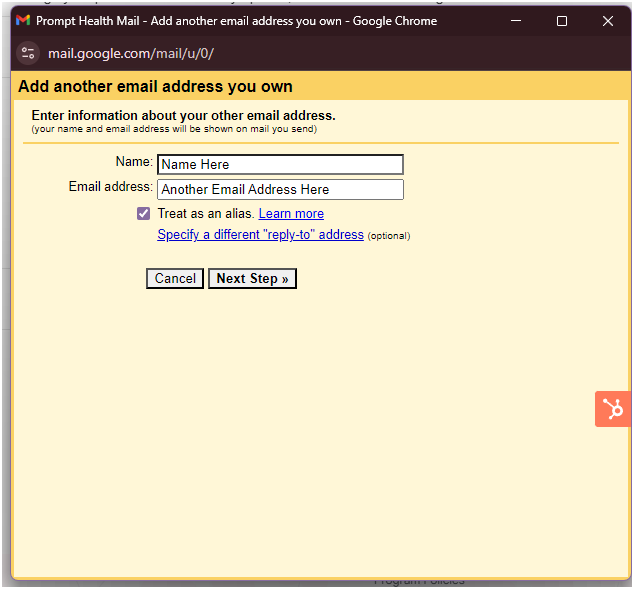
- In the popup:
- Name: Enter your name as you’d like it displayed.
- Email address: Enter your other email address.
- ✅ Make sure “Treat as an alias” is checked.
3. Enter and Verify the New Alias
You need to provide the details for the alias and confirm that you have permission to use it.
- Name: Enter the name you want recipients to see when you send an email from the alias (e.g., "Sales Team," "Support," or "Customer Service").
- Email address: Enter the full email alias that your administrator created for you (e.g.,
your.name@promptemr.com - Treat as an alias: Make sure this box is checked. This tells Gmail that this address is connected to your main inbox and not a separate account.
- Click the "Next Step" button.
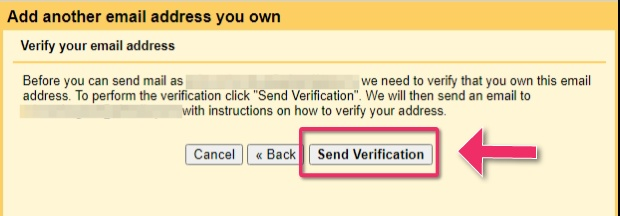
A new window will confirm that a verification email has been sent. Click "Send verification" to proceed.
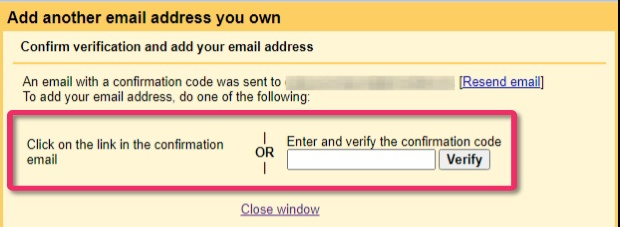
4. Confirm the Alias
The final step is to verify the alias. Google sends a confirmation link to your main email address to ensure you have access.
- Check your main inbox. You should see an email from Gmail Team with the subject "Gmail Confirmation - Send Mail as..."
- Open this email and either:
- Click on the confirmation link provided.
- Or, copy the confirmation code from the email and paste it into the pop-up window you left open.
- Click "Verify" or follow the link to complete the process.
Once verified, the pop-up window will close, and you will see your new alias listed under the "Send mail as" section in your settings.
How to Send Emails From Your New Alias
Now that the alias is set up, you can easily use it when composing a new email.
- Click the "Compose" button to start a new message.
- In the "From" field, you will now see a dropdown menu.
- Click on the menu and select your new alias. Your email will now be sent with the alias as the sender, and any replies will be directed to your primary inbox.