Multiple Prescriptions
If you have a patient with multiple cases or different home exercise programs, you can organize things more effectively using the Multiple Prescriptions feature.
Below is a video tutorial on how to add a prescription
Step-by-Step Guide:
1.) Once you've logged in as Provider, navigate to the patient's profile you want to assign another prescription to. You'll see a screen with two sections: "Adherence Log" and "Prescription."
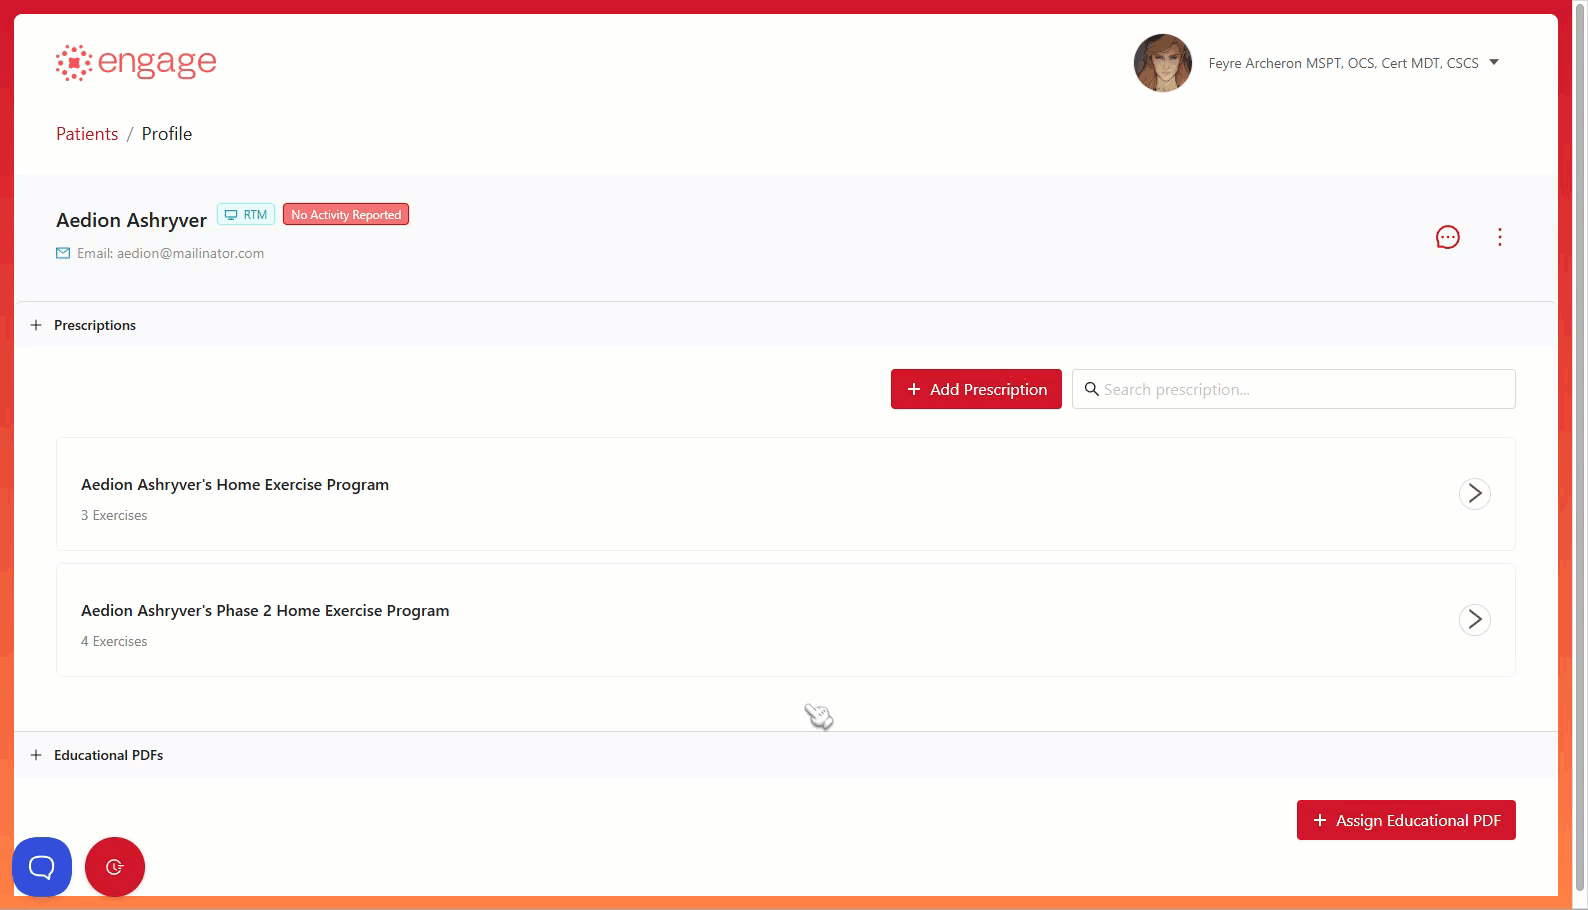
Scroll down or click the "Prescription" section. You'll see your patient's current assigned prescription(s).
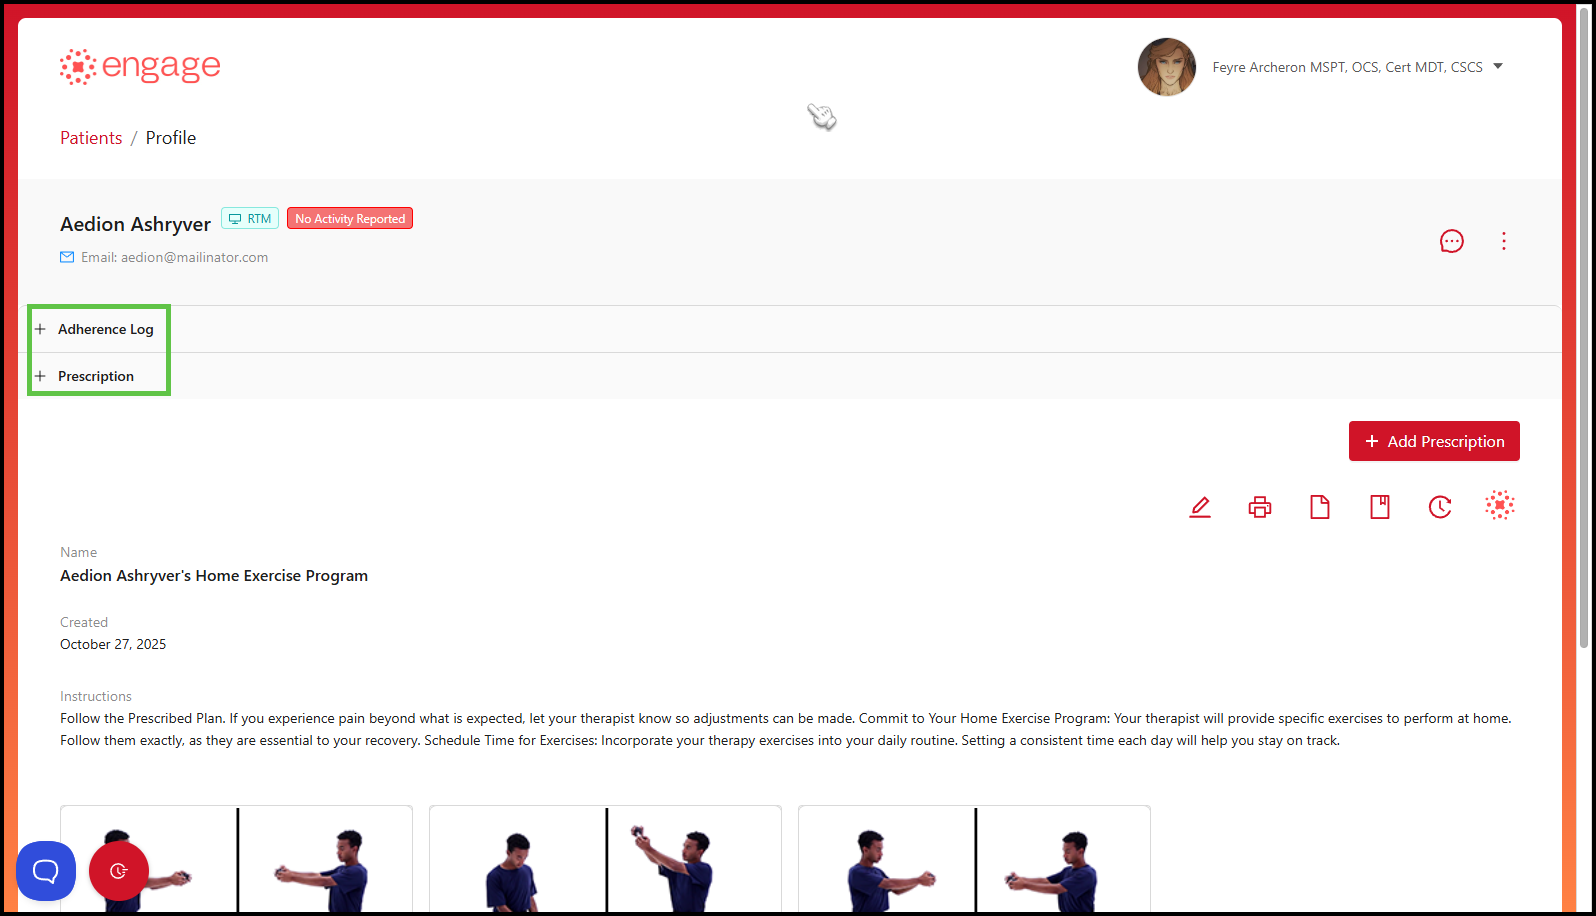
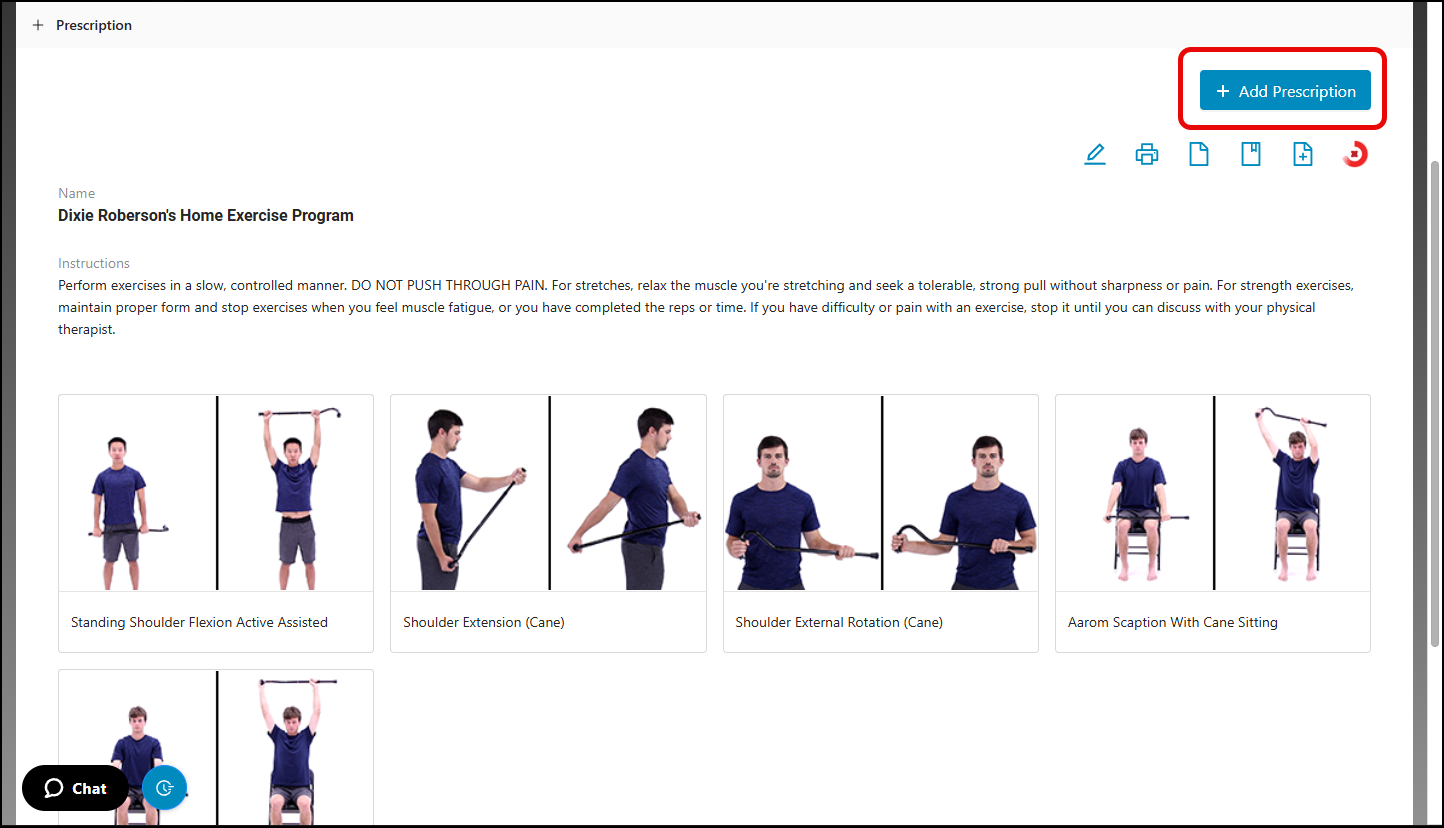
2.) To add another prescription, click the "+Add Prescription" button to the right of the patient's profile.
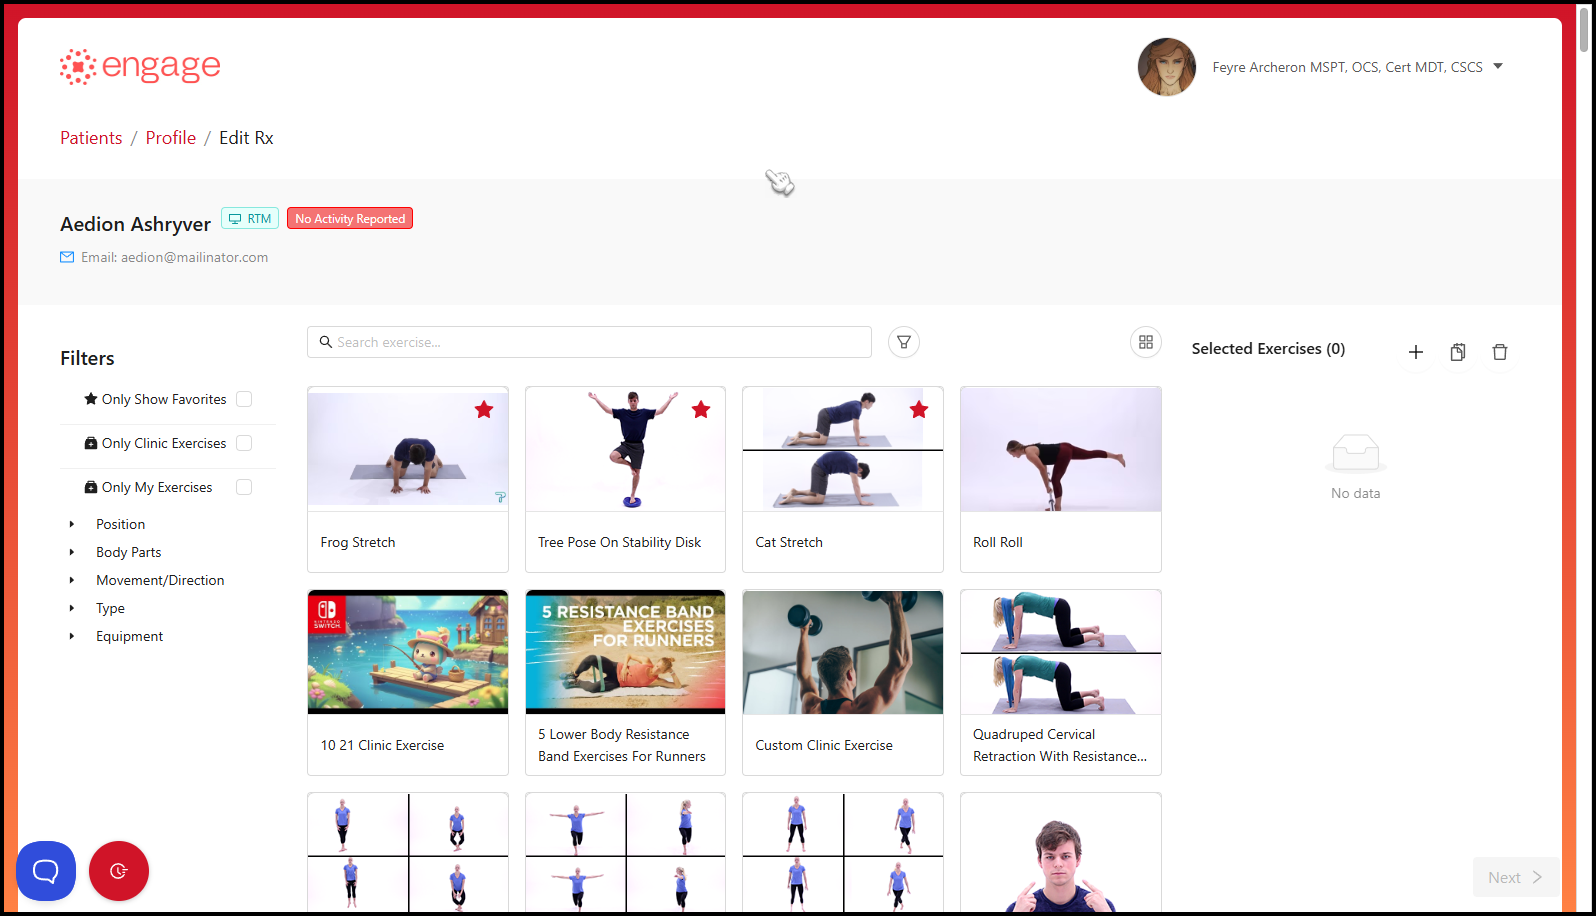
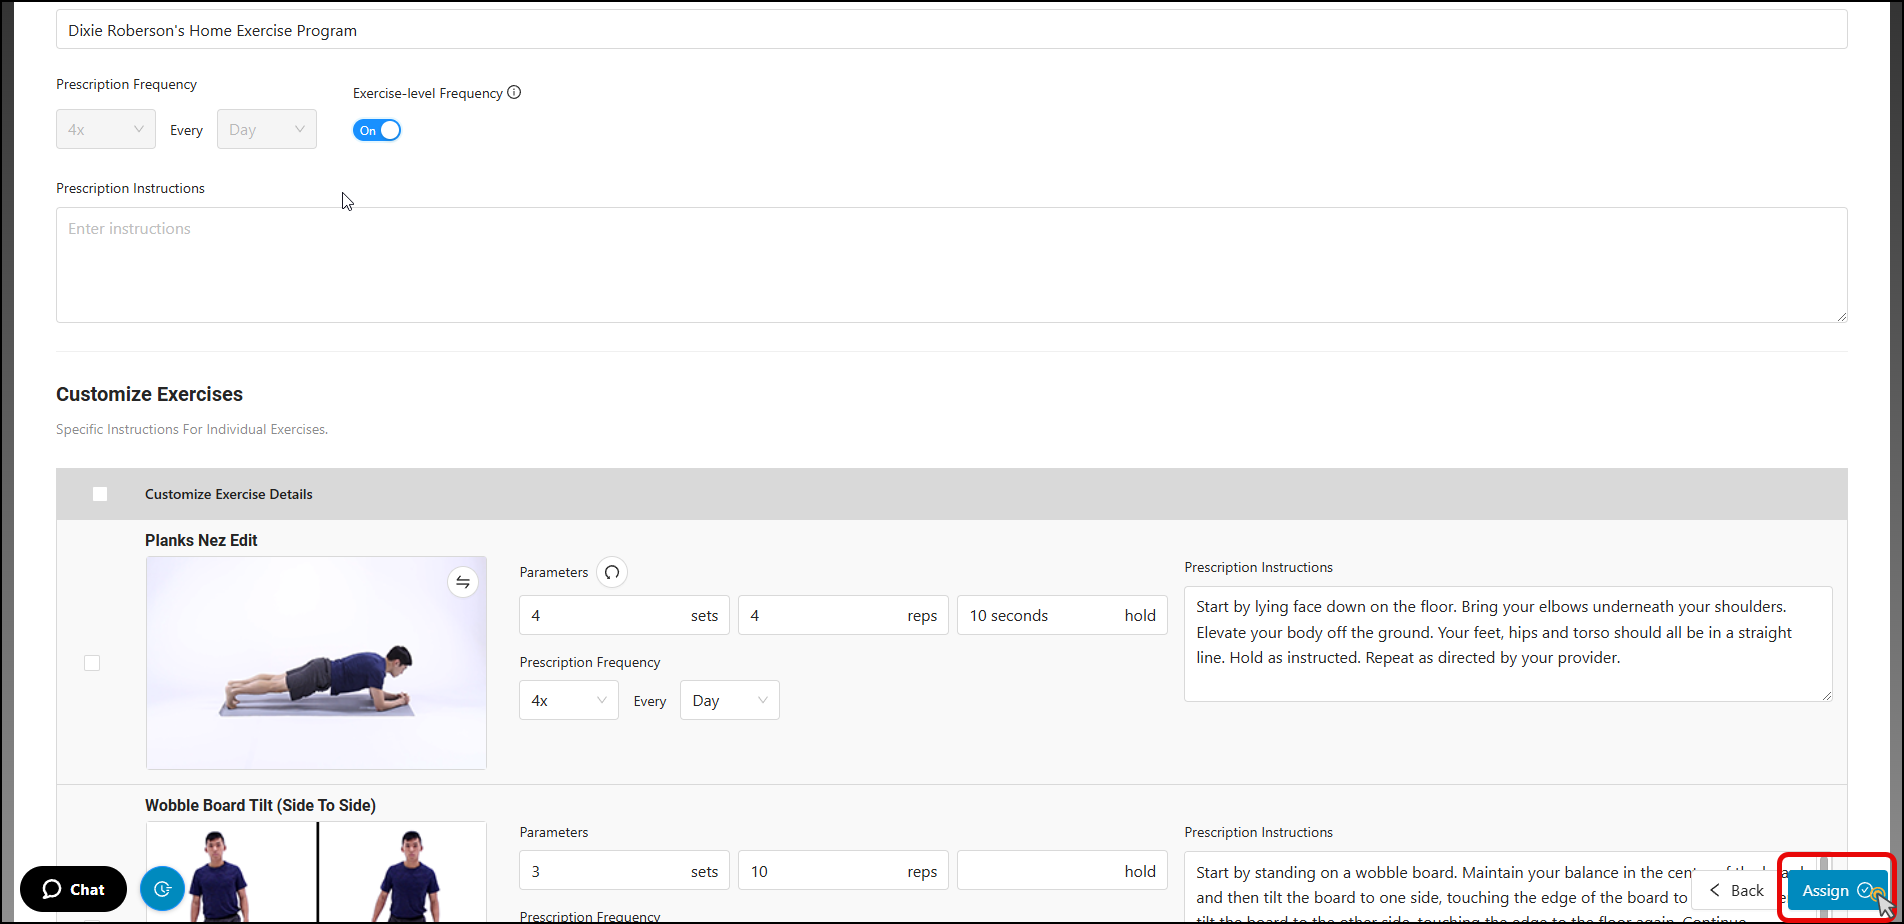
3.) You'll be directed to the home exercise program builder. The process is much like creating a prescription from scratch.
4.) Once you click "Assign" you'll get a Success! Prescription successfully updated pop-up, and the patient will receive an email notifying them that a new home exercise program has been assigned to them.
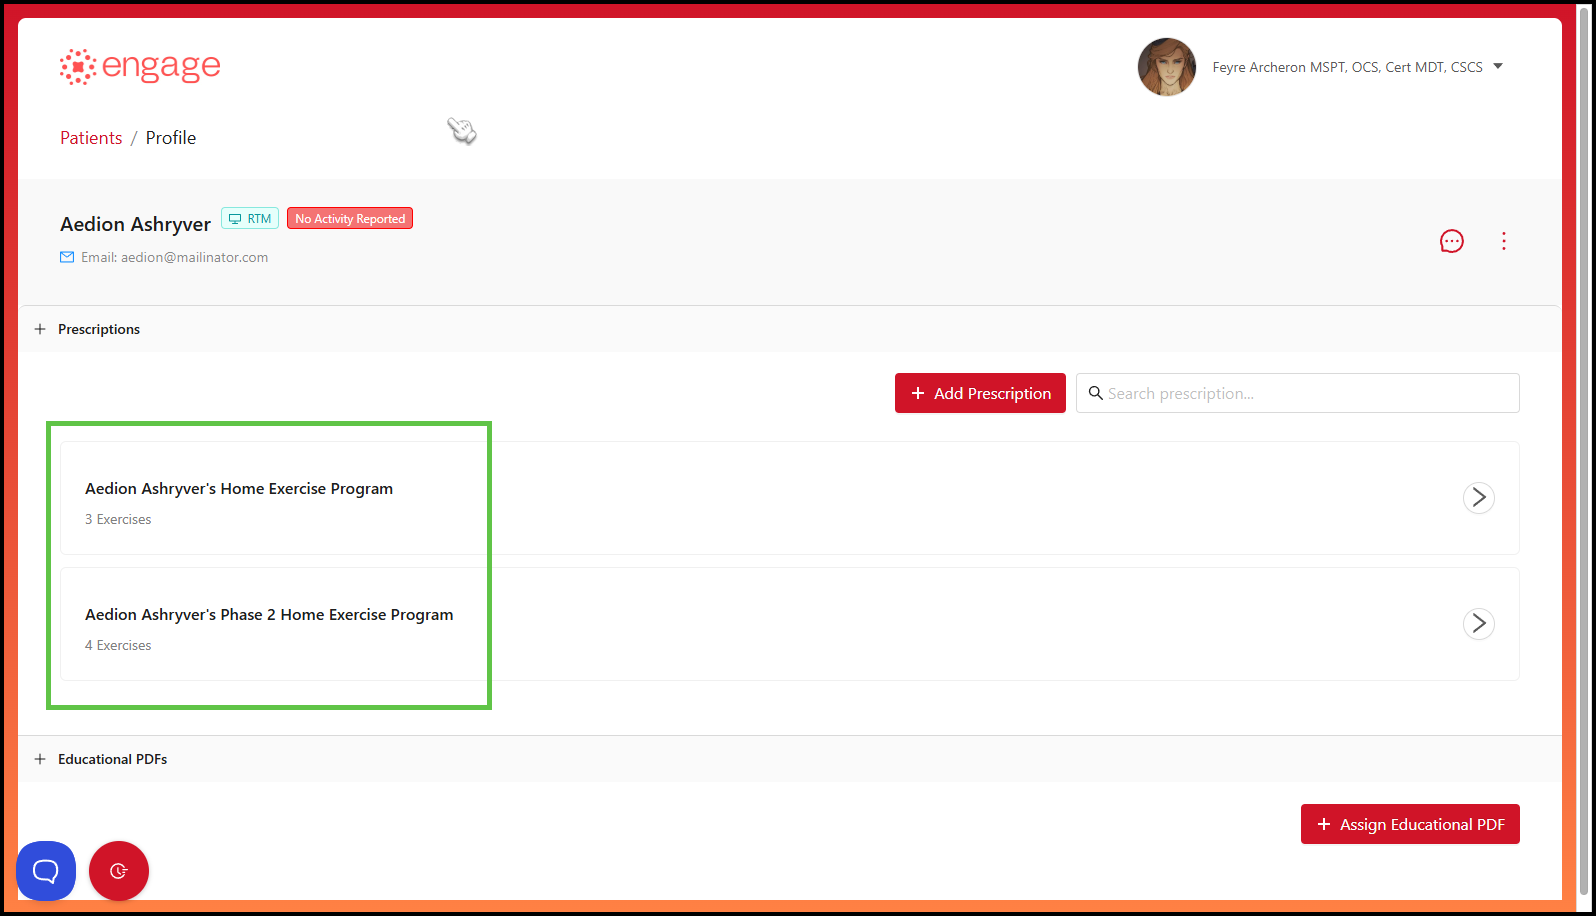
5.) On the patient's profile, you'll be able to see the different prescriptions assigned to the patient which are organized by date created.
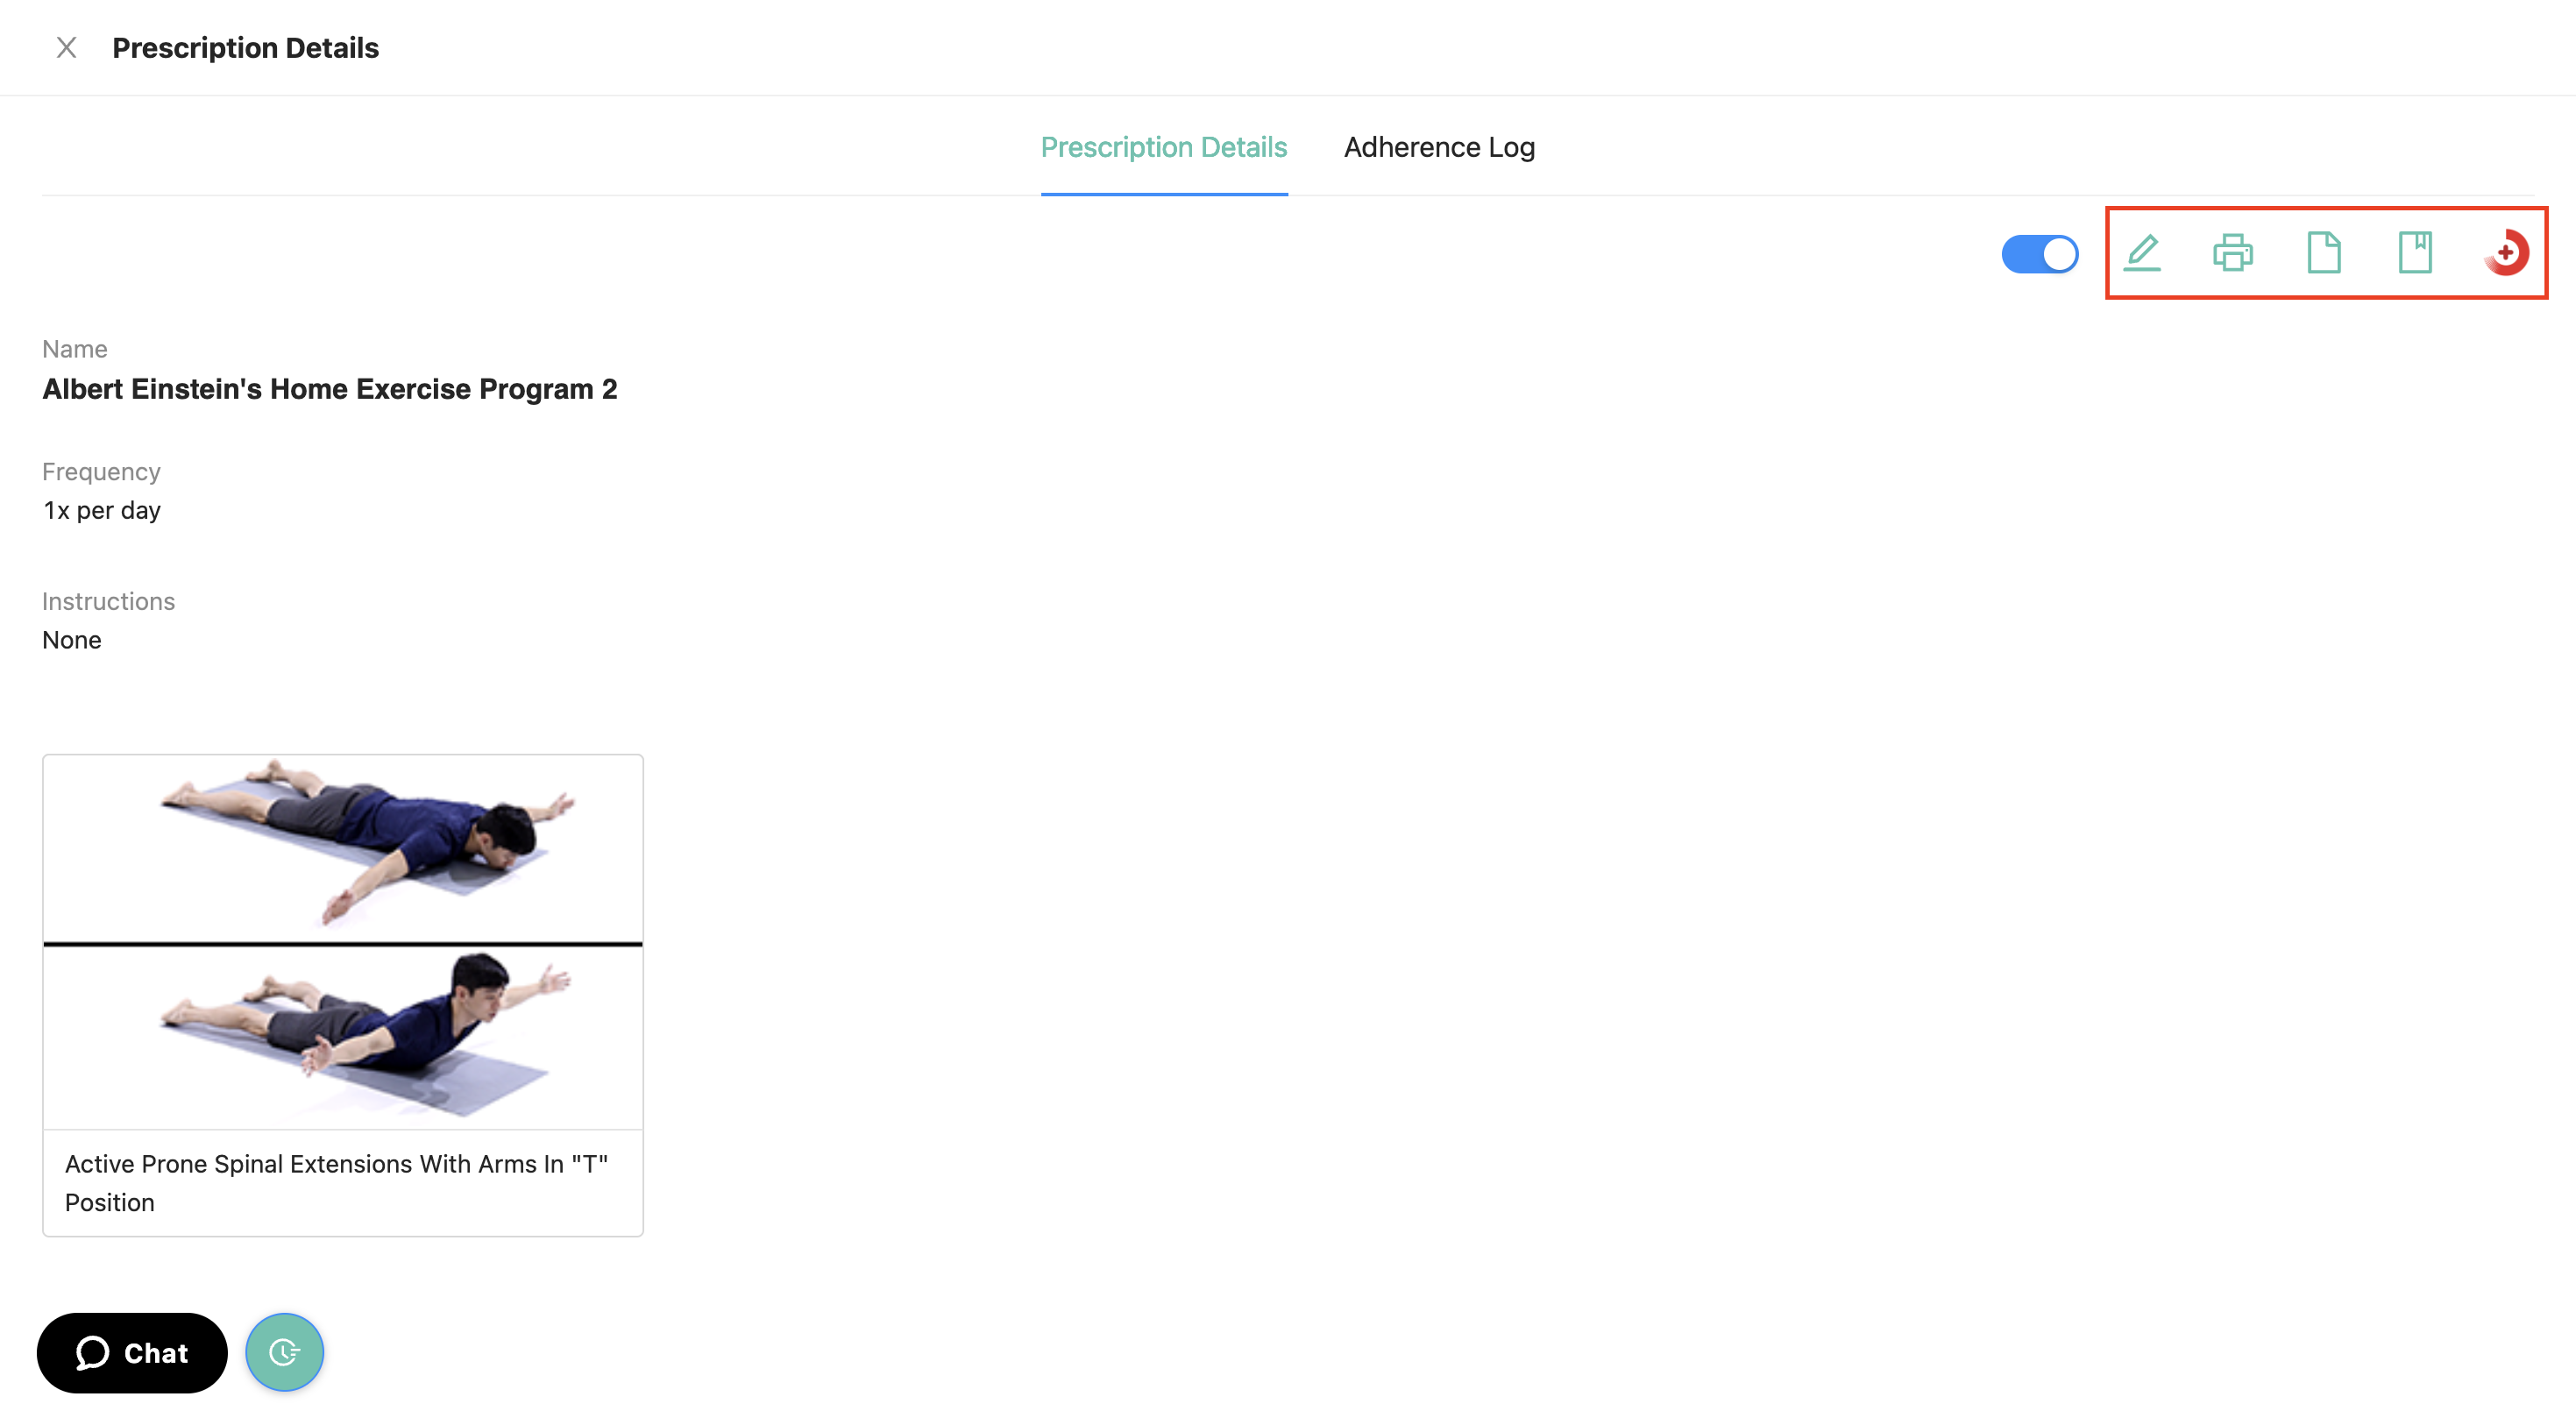
6.) From here, you'll view the Prescription Details and Adherence Log for each prescription once you've clicked on the desired prescription.
7.) If you'd like to enable or disable the prescription, simply toggle the blue button "off," which will render it grey in color. Once disabled, you'll receive a Success! Prescription has been disabled pop-up to advise that the prescription has been disabled. You can enable the prescription again at any time.
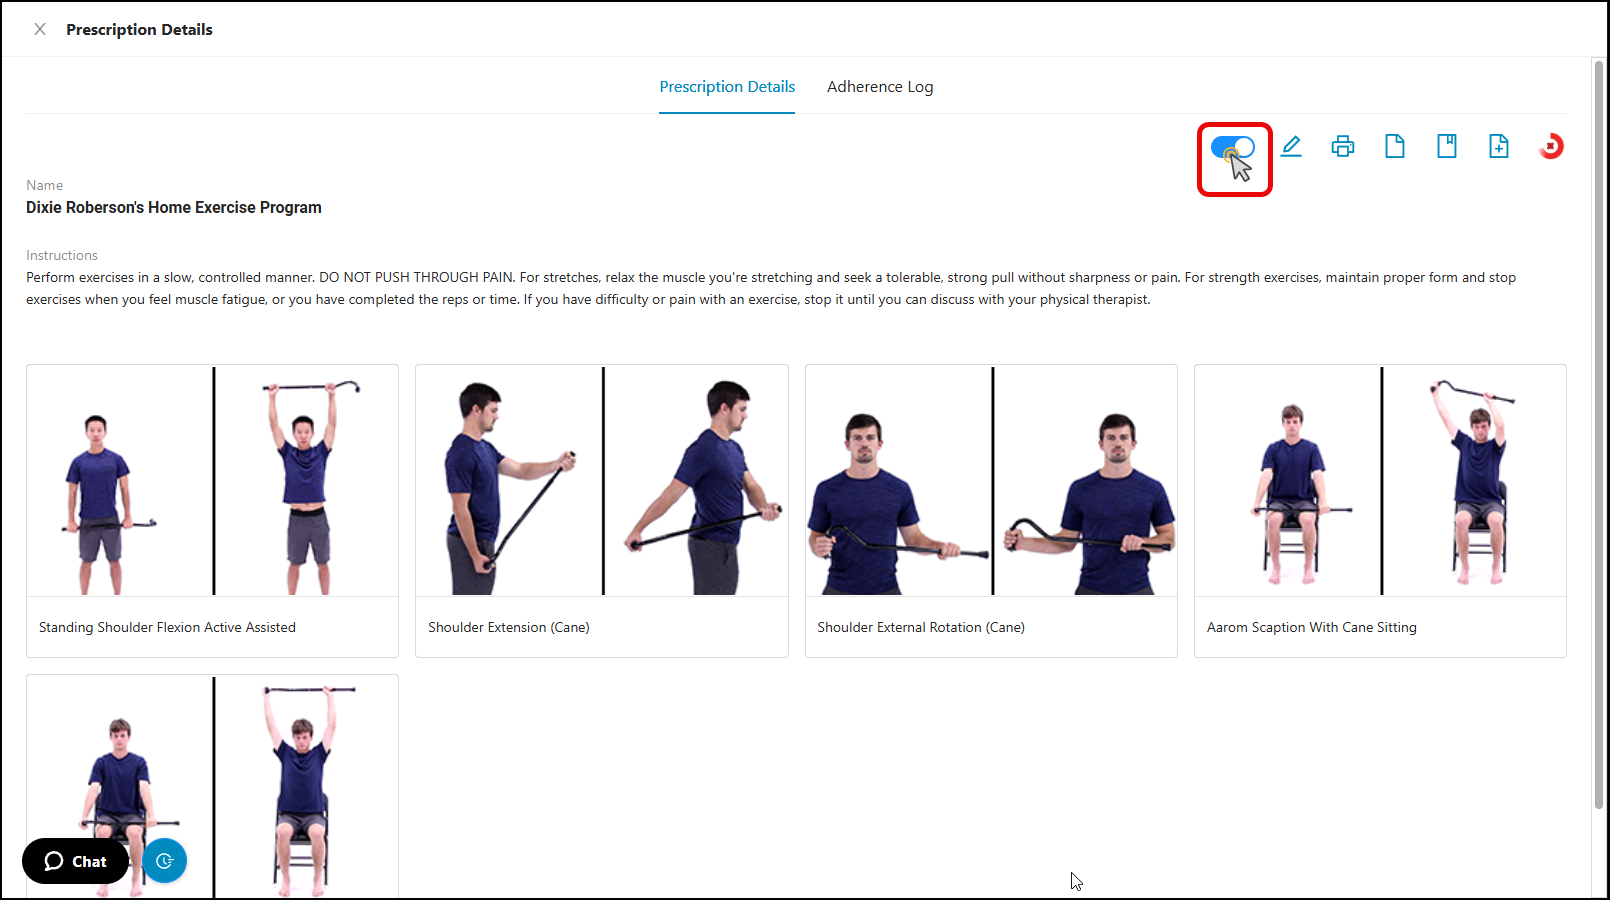
8.) The same buttons are available to edit and print the prescription, as well as the Documentation, Save as Template and Export HEP to Visit in Prompt (if your group uses Prompt EMR) buttons.